
Friday, December 14, 2012
Weaving with construction paper
Snowman

Snowflakes

Tuesday, October 2, 2012
More fun with toilet paper rolls

I thought they turned out pretty cute! Of course not as nice as the posting I found on Pinterest.
Friday, August 24, 2012
paper plate dreamweaver

paper plate with middle cut out
yarn and/or ribbon
glue or tape
stickers, markers, colored pencils to decorate dreamweaver
scissors
Construction paper
1. Cut out the middle of the paper plate and then little slits around the outside of the paper plates. The little slits are for the yarn.
2. Decorate the plate using whatever supplies you want.
3. Start wrapping the yarn around the plate putting the yarn through the little slits. Make sure to leave enough yarn at the top to tie a not so you can hang the dreamweaver on a doorknob or nail.
4. Tape some decorations to the end of ribbon and then tape the other end of the ribbon to the paper plate.

Thursday, August 23, 2012
bottle cap spelling

items needed:
bottle caps
construction paper or old magazines
scissors
pen/pencil
After researching ideas to use with some of the bottle caps I have saved up I decided to use some of them to help my daughter with spelling and words.

Plastic Bottle Cap Art
I have recently started saving plastic bottle caps. I have seen some cute plastic bottle cap art around and thought it would be a fun activity for my daughter and I. Check out some of these cute ideas:
http://www.artgrange.com/michelleworkshop.html
http://inspirationgreen.com/art-from-bottle-tops.html
Not only can you make art, but you can use them to make game pieces or magnets!
http://www.artgrange.com/michelleworkshop.html
http://inspirationgreen.com/art-from-bottle-tops.html
Not only can you make art, but you can use them to make game pieces or magnets!
Friday, August 17, 2012
Washi Tape Pencils
Found this really cute idea to decorate pencils online:
http://pinkandgreenmama.blogspot.com/2012/08/back-to-school-supply-makeover-washi.html?utm_source=feedburner&utm_medium=feed&utm_campaign=Feed%3A+blogspot%2FHmTrN+%28Pink+and+Green+Mama%29&utm_content=Google+Reader
I haven't used Washi tape before, but I may have to get some and try this out! My daughter loves art projects and this seems simple and fun!
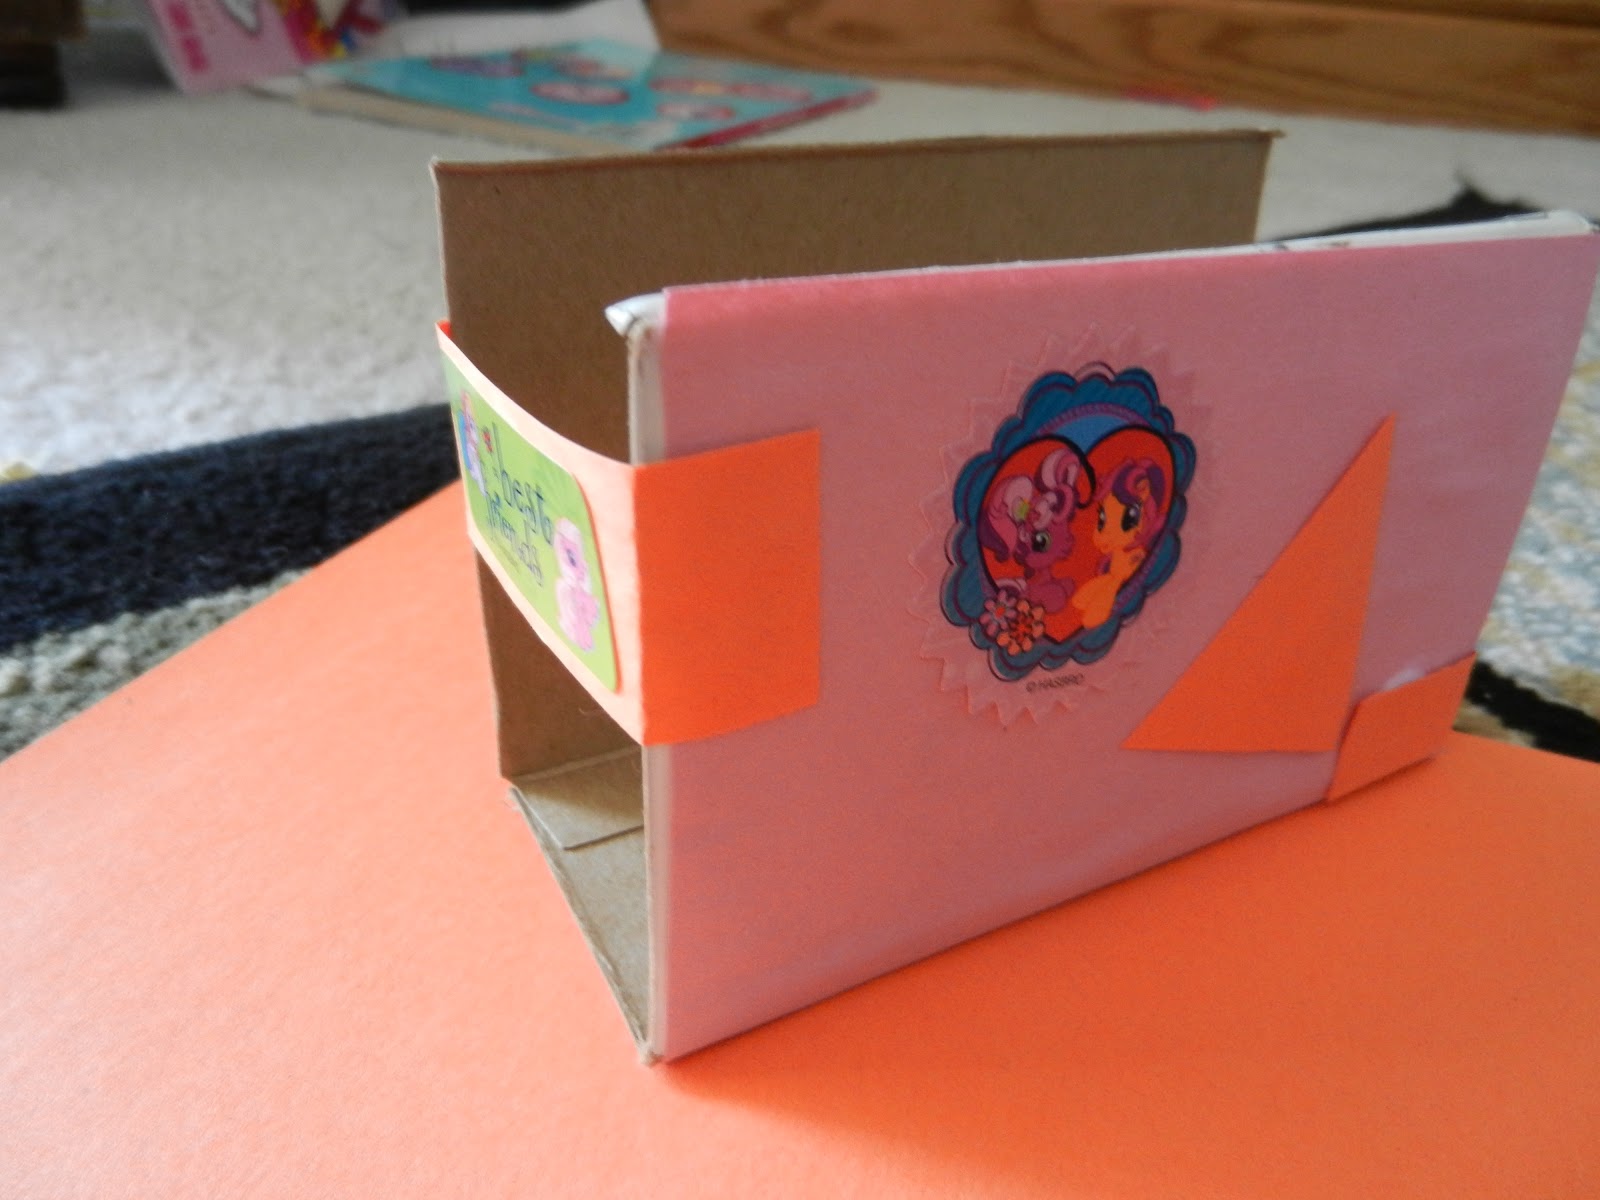
Monday, August 13, 2012
Napkin holder made from mini cereal box

The first step was to cut the box sides leaving one side together, the bottom, as pictured above.
making pictures with rocks

Sunday, August 12, 2012
My first diaper cake

Diapers (Not the newborn size)
rubber bands or those thin plastic hair ties
bottle (or anything else for the top of the cake)
Ribbon
Tape or glue
Bowl (or something similar that you can wrap the diapers around) You will need at least two, one bigger then the other.
Any other decorative item (stuffed animals, flowers, etc)
Yarn
First thing you should do after you have all your supplies is start rolling the diapers wrapping the rubber bands around them. I did mine the night before when I had some friends over. This made the project quick and easy the next day. Then use a bowl turned upside down and start setting the diapers around it. After one set of diapers are set around the bowl use yarn or something similar to keep them in place. Then start with another row of diapers and do the same thing. You can do as many rows as you like but at least do two or three. Wrap the outer edge with a cute ribbon and fasten it with glue or tape (I used hot glue).
Set the second bowl on top of the bottom tier and do the same process as described above. Then for the top tier use the bottle and wrap the diapers around the bottles. I used some stuffed animals to decorate the cake too. Super cute and my friends loved it!
Friday, August 3, 2012
Pop Tab Bracelets
I have never made these before but they look easy and fun. Check out this video I found while I was surfing around youtube for some new craft ideas:
Wednesday, August 1, 2012
Making a fan

Tuesday, July 31, 2012
Pizza Collage


Just cut out your pieces and glue them all together! My daughter had so much fun with this!
Monday, July 30, 2012
Painted Lady Butterfly Kits

I bought the Insect Lore Butterfly garden and then sent in for the caterpillars. They arrived in the mail in less than a weeks time.
My daughter checked the caterpillars everyday and was so excited to see them change into chrysalids. We really wanted to keep them around as pets for a few days but my husband thought it would be better to let them go. :(
Friday, July 20, 2012
Bull from Michael's

The body of the bull is a small terra cotta pot that cost .73 and was painted black.
The feet, ears, nose, and horns are foam pieces that were cut out.
The head is a styrofoam ball painted black.
Googly eyes.
There is a black piece of yarn used for a tail in the back of the bull that you can't see in the picture.
My daughter is so proud of her creation! She can't wait to go back on Saturday to make the next craft!
Thursday, July 19, 2012
Puzzles

Monday, June 25, 2012
Construction paper animals

Sunday, June 24, 2012
Fingerpainting

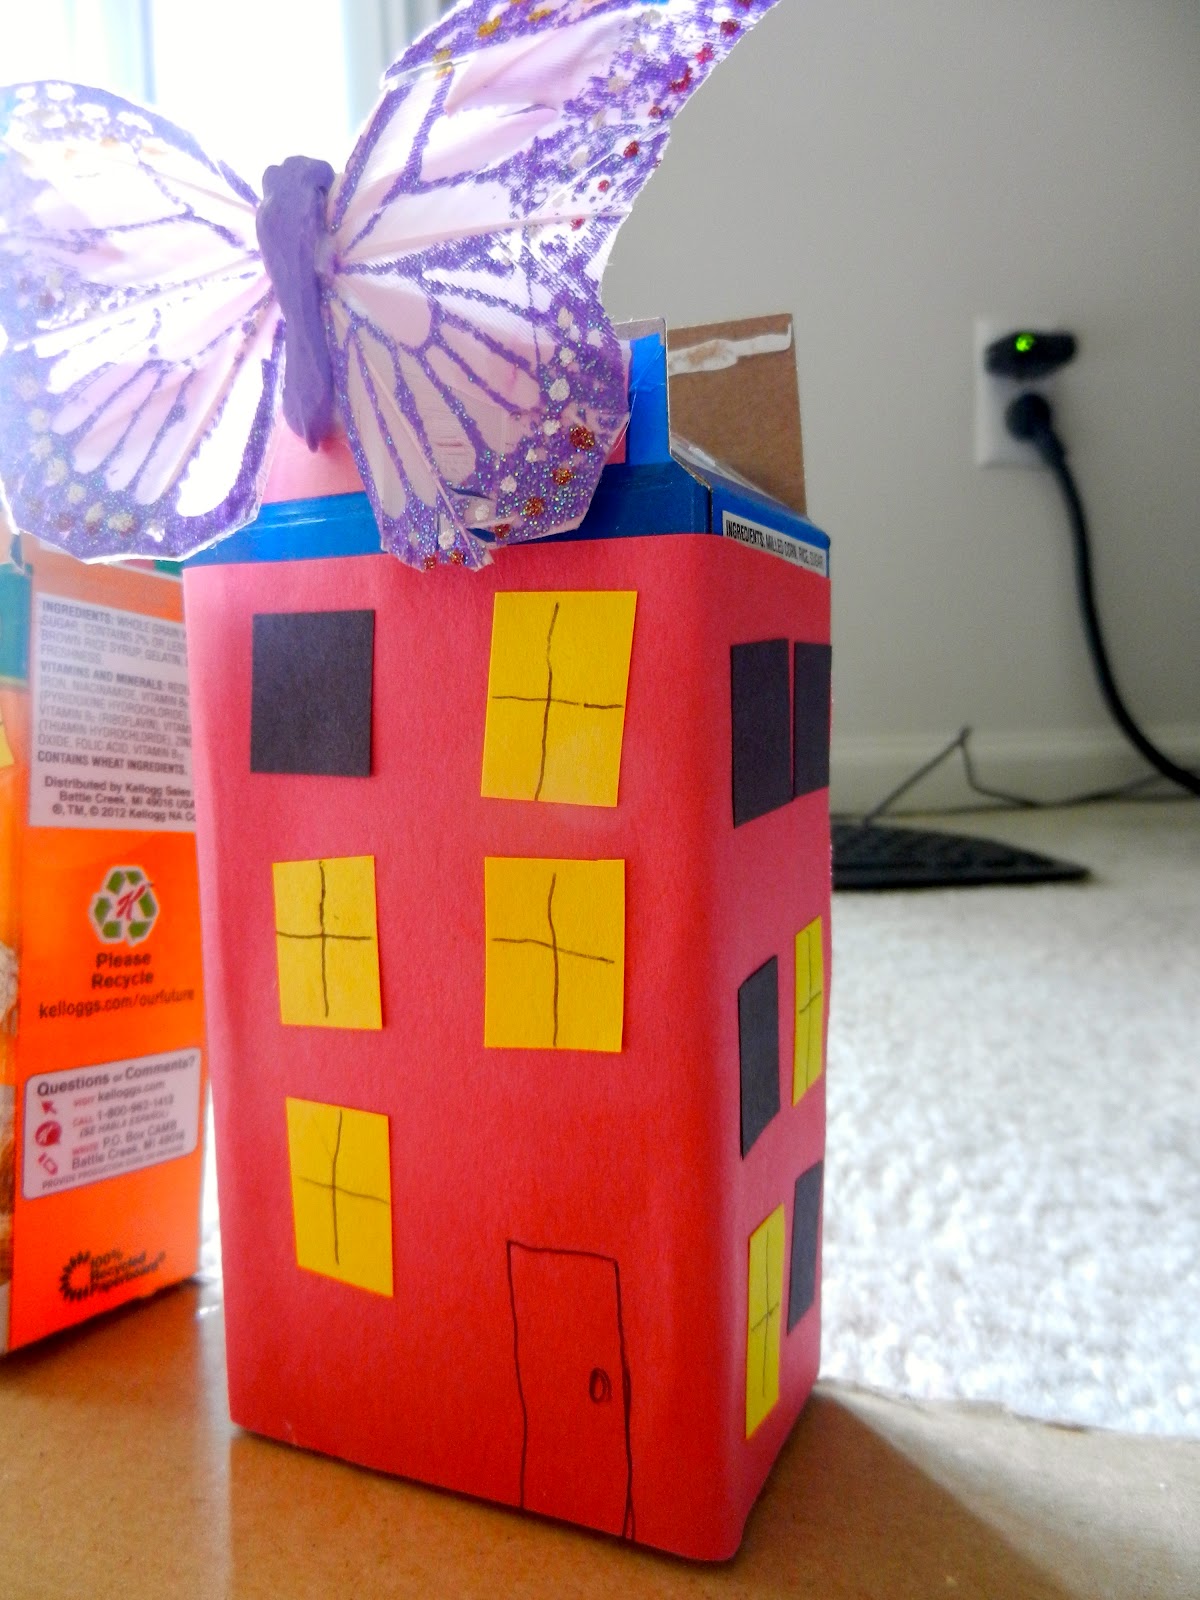
Saturday, June 23, 2012
What to do with those small cereal boxes


Instead of using construction paper to cover the boxes you could use paint or cut out doors in the front of them. Another idea is using cotton balls to make a wintery scene!
Sunday, May 13, 2012
Pie Pins/ Girl Scout Swaps

I made these cute little pins (also called swaps) with my daughter and her girl scout troop this past weekend.
This is what you will need:
Bottle caps
Brooch pins (you can buy these at Michaels)
brown felt or construction paper
small beads
glue
glue gun


Step 2: Fill the inside of the bottle cap with glue.
Step 3: Put the beads on top of the glue and let dry for a few minutes.

Friday, April 20, 2012
Paper Fortune Tellers

Sunday, April 8, 2012
low carb egg muffins

5 or 6 eggs
prosciutto cubes
diced onions
salt
pepper
milk
muffin pan (I used a mini muffin pan)
1. put a few prosciutto cubes along with a pinch of onions in the mini muffin pan.
2. preheat oven to 350 degrees.
3. whisk the eggs with milk and pour a little bit into each muffin. Do not fill to the top, just a little below to the rim.
4. Cook for 5-10 minutes in the oven. I don't have an exact time, because I wasn't paying attention. I just kept a watch on the oven while I cleaned the kitchen/unloaded the dishwasher.
5. Use a spoon to take the eggs out and then sprinkle with some salt and pepper.
You don't have to use the prosciutto or onions like I did with my recipe. Try diced tomatoes or bell peppers. This is such a quick and easy recipe. This is what we had a long with toast for our Easter morning breakfast.

Friday, April 6, 2012
cotton ball sheep

Materials needed:
cotton balls
bowl of glue (to dip cotton balls in)
paper/construction paper
scissors
1. cut out the body, legs, tail, head, and eye.
2. glue the body parts to the body.
3. glue the cotton balls to the body.
If you have a little googly eye you can use that for the eye instead. This is really cute.
Thursday, April 5, 2012
watermelon

Wednesday, April 4, 2012
lines

Thursday, March 29, 2012
jelly bean necklace

I will post more pictures after the weekend of the ones my daughter and her friends made.
Wednesday, March 28, 2012
using tissue paper to make flowers

I am really using up this tissue paper I have. Any other ways tissue paper can be used in art projects?
Tuesday, March 27, 2012
Fabric Flowers


For this project you will also need:
fabric glue or needle with thread
buttons for the middle of the flower
candle


Monday, March 26, 2012
fabric necklace


Sunday, March 25, 2012
Egg Yolk Paint

materials needed:
egg
small bowl
water
spoon
fork
food coloring1. Crack the egg and put the yolk in the bowl. Only the yolk. Throw the egg white and egg shell away.
2. Add about 8-10 drops of food coloring and a spoon full of water into the bowl.
3. Mix with a fork and add water until you achieve a paint-like consistency.
4. Paint!
Saturday, March 24, 2012
making suds

Materials needed:
Tall plastic cup or any other tall container
liquid dish detergent
1/2 cup warm water
1 tsp. Baking soda
Citric acid
Measuring cups
1. Mix three big squirts of the liquid dish detergent, 1/2 cup warm water, and one teaspoon of baking soda in the plastic container.
2. Sprinkle in couple pinches of the citric acid into the solution.
3. Watch the suds form.
note: I bought my citric acid from amazon.com. It's a rather large bag of it, but I do use it when I am making my own dishwasher detergent.
To integrate this into a science experiment discuss with the children what a base and an acid is. The suds occur because the baking soda is a base and when you add the acid (citric acid), it produces carbonic acid. The carbonic acid breaks down the water and carbon dioxide as a gas and the gas launches the bubbles. Can you think of other household acid and bases?
Friday, March 23, 2012
Using plastic bottles to make prints


Thursday, March 22, 2012
making crayons

Just a little hint, I can tell the different between Crayola crayons and the cheap crayons. It seemed like the cheap crayons added a layer of oil.
Wednesday, March 21, 2012
Making Paint from Cornstarch


White vinegar
Cornstarch
Water
Bowl
Spoon
Food coloring
Baby food jars or any other container that might work.
The first thing I did was put about 2 Tbs cornstarch, 2 Tbs white vinegar, and 2Tbs water and mixed them all together. Then I divided up the mixture between the three little containers I was using.
Then I added in about 5-7 drops of food coloring into each jar and mixed it up.
Then I let my daughter come up with her own little creation.

Subscribe to:
Posts (Atom)